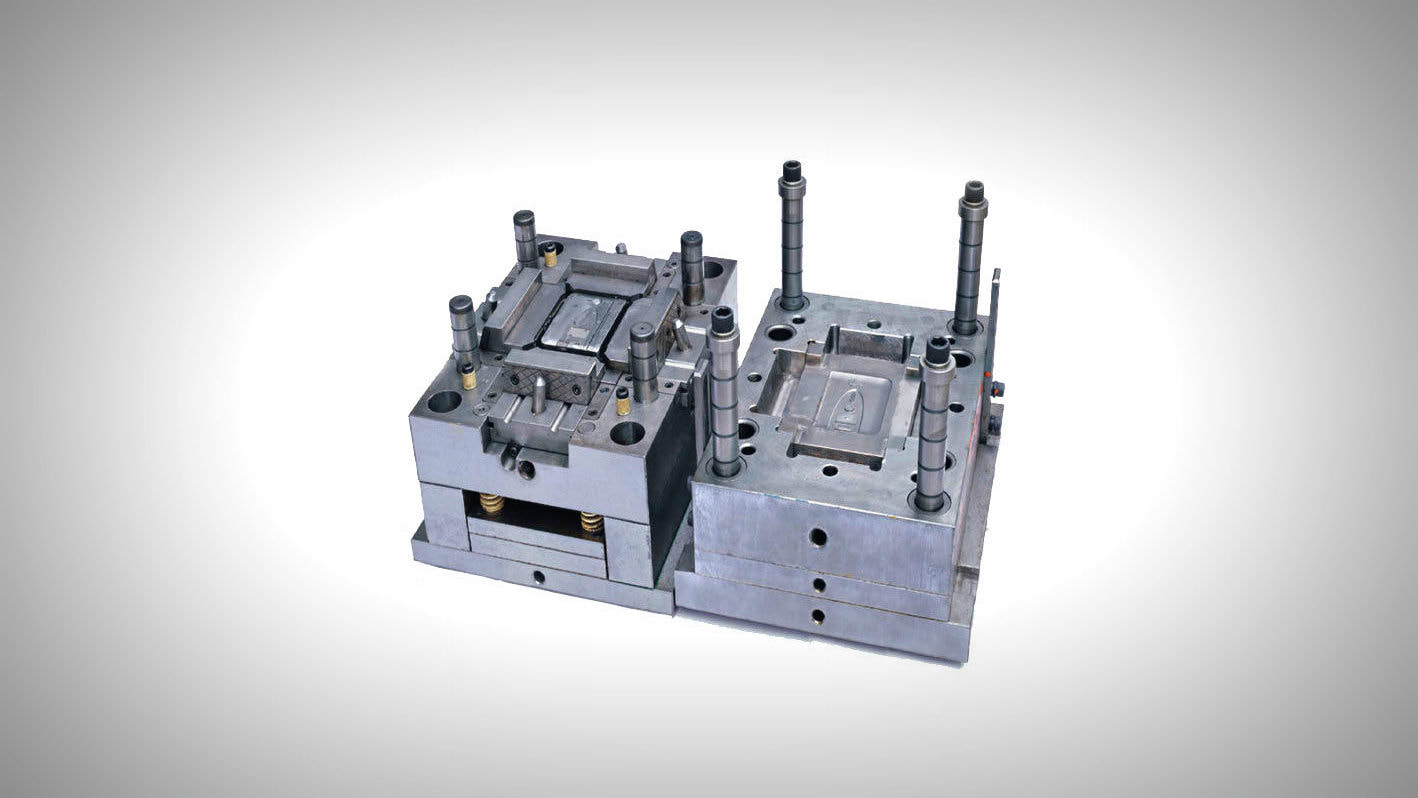
An injection molding machine consists of several key components that work together to produce plastic parts.
The main parts and components of an injection molding process are:
1. Injection Unit:
- Hopper: Holds and feeds plastic pellets into the machine[1][10]
- Barrel: Contains the screw and houses the melting plastic[1][10]
- Screw: Melts, mixes, and moves the plastic material forward[2][10]
- Heater bands: Provide thermal energy to melt the plastic[1][12]
- Nozzle: Connects the barrel to the mold and directs molten plastic[5][12]
2. Clamping Unit:
- Movable platen: Holds one half of the mold and applies pressure[12]
- Stationary platen: Holds the other half of the mold[5]
- Tie bars: Guide the movement of the movable platen[2]
- Toggle mechanism: Provides the clamping force[2]
- Mold adjustment system: Allows for precise mold positioning[2]
3. Mold:
- Cavity: Forms the outer shape of the part[7]
- Core: Forms the inner shape of the part[7]
- Sprue: Entry point for molten plastic into the mold[7][11]
- Runner system: Channels that distribute plastic to cavities[7][11]
- Gates: Control the flow of plastic into the cavities[7]
- Ejector pins: Push the finished part out of the mold[7][8]
- Cooling channels: Regulate mold temperature[7]
4. Hydraulic System:
- Hydraulic pump: Generates pressure for machine operations[3]
- Actuators: Convert hydraulic pressure into mechanical motion[3]
- Valves: Control the flow of hydraulic fluid[3]
5. Control Unit:
- Electronic controls: Manage machine operations and parameters[2][5]
6. Cooling Unit:
- Cooling system: Regulates temperature of the mold and hydraulic fluid[5]
These components work together to melt plastic pellets, inject the molten material into a mold cavity, cool and solidify the part, and eject the finished product[4][10][12].
Citations:
[1] https://www.cewheelsinc.com/industry-news-blog/injection-molding-machine-construction-working-application-advantages-disadvantages/
[2] https://guanxin-machinery.com/components-parts-of-injection-molding-machine/
[3] https://thriam.com/injection-molding-machine-parts
[4] https://www.youtube.com/watch?v=jYIypsWQjLU
[5] https://moldblade.com/en/parts-of-the-injection-molding-machine/
[6] https://www.linkedin.com/pulse/components-parts-injection-molding-machine-explained-ron-perkins-dcbze
[7] https://waykenrm.com/blogs/injection-mold-components/
[8] https://images.prismic.io/xometry-marketing/Zr98C0aF0TcGJAVU_InjectionMoldingMachinecopy2-1-.png?auto=format%2Ccompress&fit=max&w=4501&h=4500&sa=X&ved=2ahUKEwi8rfryzdCKAxUjETQIHegCG-YQ_B16BAgCEAI
[9] https://firstmold.com/guides/injection-mold-components/
[10] https://www.xometry.com/resources/injection-molding/injection-mold-components/
[11] https://en.wikipedia.org/wiki/Injection_moulding
[12] https://www.xometry.com/resources/injection-molding/basics-of-plastic-injection-molding/
Key Differences Between Mold Classes (105 to 101)
The main parts and components of an injection molding process are:
1. Injection Unit:
- Hopper: Holds and feeds plastic pellets into the machine[1][10]
- Barrel: Contains the screw and houses the melting plastic[1][10]
- Screw: Melts, mixes, and moves the plastic material forward[2][10]
- Heater bands: Provide thermal energy to melt the plastic[1][12]
- Nozzle: Connects the barrel to the mold and directs molten plastic[5][12]
2. Clamping Unit:
- Movable platen: Holds one half of the mold and applies pressure[12]
- Stationary platen: Holds the other half of the mold[5]
- Tie bars: Guide the movement of the movable platen[2]
- Toggle mechanism: Provides the clamping force[2]
- Mold adjustment system: Allows for precise mold positioning[2]
3. Mold:
- Cavity: Forms the outer shape of the part[7]
- Core: Forms the inner shape of the part[7]
- Sprue: Entry point for molten plastic into the mold[7][11]
- Runner system: Channels that distribute plastic to cavities[7][11]
- Gates: Control the flow of plastic into the cavities[7]
- Ejector pins: Push the finished part out of the mold[7][8]
- Cooling channels: Regulate mold temperature[7]
4. Hydraulic System:
- Hydraulic pump: Generates pressure for machine operations[3]
- Actuators: Convert hydraulic pressure into mechanical motion[3]
- Valves: Control the flow of hydraulic fluid[3]
5. Control Unit:
- Electronic controls: Manage machine operations and parameters[2][5]
6. Cooling Unit:
- Cooling system: Regulates temperature of the mold and hydraulic fluid[5]
These components work together to melt plastic pellets, inject the molten material into a mold cavity, cool and solidify the part, and eject the finished product[4][10][12].
Citations:
[1] https://www.cewheelsinc.com/industry-news-blog/injection-molding-machine-construction-working-application-advantages-disadvantages/
[2] https://guanxin-machinery.com/components-parts-of-injection-molding-machine/
[3] https://thriam.com/injection-molding-machine-parts
[4] https://www.youtube.com/watch?v=jYIypsWQjLU
[5] https://moldblade.com/en/parts-of-the-injection-molding-machine/
[6] https://www.linkedin.com/pulse/components-parts-injection-molding-machine-explained-ron-perkins-dcbze
[7] https://waykenrm.com/blogs/injection-mold-components/
[8] https://images.prismic.io/xometry-marketing/Zr98C0aF0TcGJAVU_InjectionMoldingMachinecopy2-1-.png?auto=format%2Ccompress&fit=max&w=4501&h=4500&sa=X&ved=2ahUKEwi8rfryzdCKAxUjETQIHegCG-YQ_B16BAgCEAI
[9] https://firstmold.com/guides/injection-mold-components/
[10] https://www.xometry.com/resources/injection-molding/injection-mold-components/
[11] https://en.wikipedia.org/wiki/Injection_moulding
[12] https://www.xometry.com/resources/injection-molding/basics-of-plastic-injection-molding/
Key Differences Between Mold Classes (105 to 101)
- Production Volume: Ranges from very low (105: <500 cycles) to extremely high (101: >1M cycles).
- Material Quality: Improves from basic prototype materials (105) to highest-quality, corrosion-resistant materials (101).
- Durability: Varies from short-term prototype use (105) to long-term, high-volume durability (101).
- Hardness: Starts undefined for prototypes (105-104) and increases to min 28 R/C base, 48 R/C surfaces for 102-101.
- Temperature Control: Not prioritized in 105-104, but becomes essential in 103 and fully integrated in 102-101.
- Cost: Increases from the lowest (105, for prototypes) to the highest (101, for maximum precision and longevity).